
Arcadia 80's VHS Style : 포토샵 듀토리얼 [펌] , Conclusion
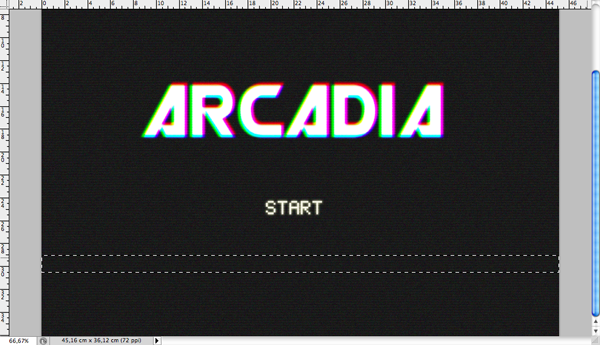
Conclusion Final Image

Step 1
Open up Photoshop and create a new Document at your desired size in RGB-Color. Fill the Background of the image with a very dark grey (#141414 in my example).

Step 2
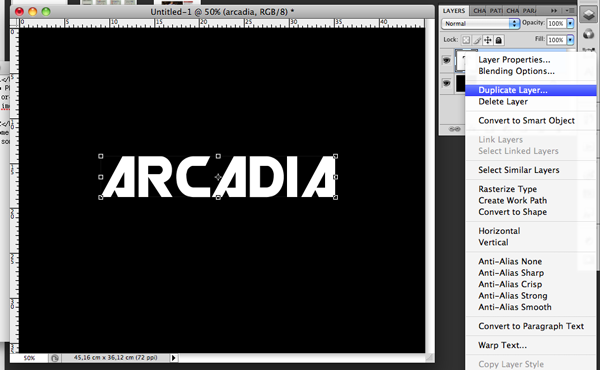
Take some cool Retro-Font (Robo-Font) and write something in white.
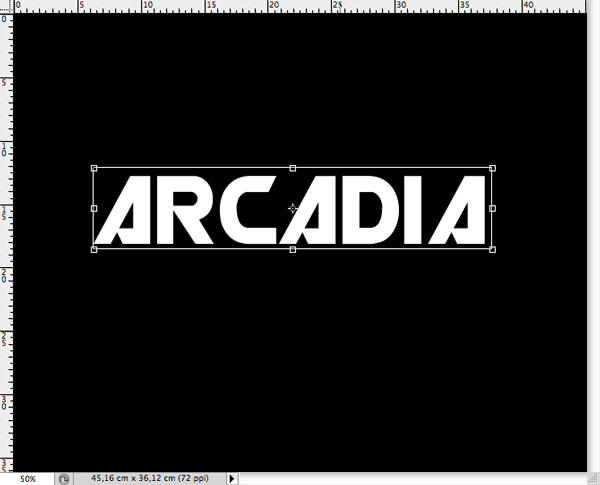
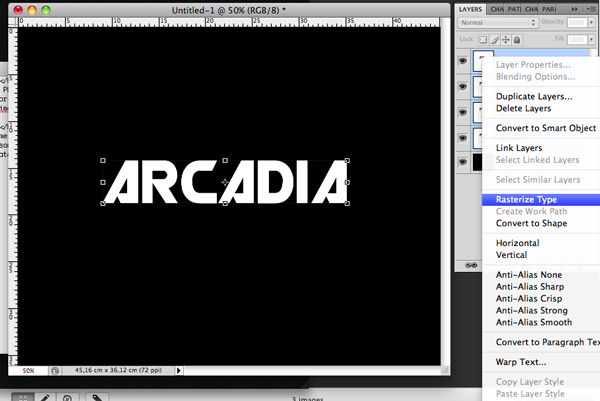
Now duplicate the text layer layer three times and rasterize all text layers.
Step 3
Take the first copy layer and press Command (MAC)/ Control (PC) L (Strg-L or go to Image>Adjustments>Levels). Take the Red Channel and set the Output Level to 0. As well as the Green Channel. Press Ok. This layer must now be blue, because it's the only color with output. Now take the next copy layer and do the same for the channels Red and Blue. After this the last thing to do is to copy the layer for the channels Green and Blue.
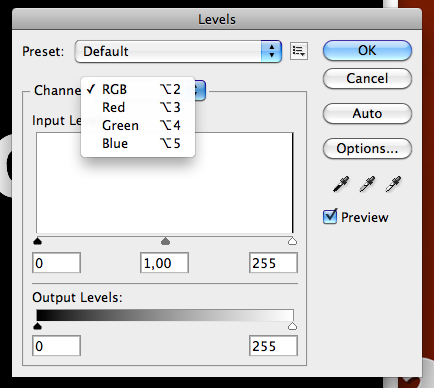

Now you should have three layers in the colors blue, green and red.
(Yes I know, this could also be done with the normal text color, but I want to show you a way where you can use this on any type of material, also images)
Step 4
Set the white layer to the top and select the Blend Mode "Overlay". For the copied layers select the Blend Mode "Exclusion". Now take the copied layers and set them a little bit apart from the original location.
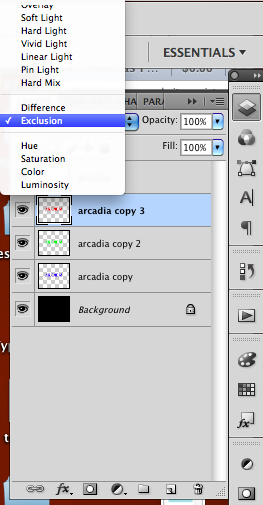
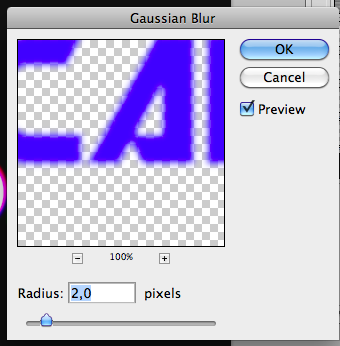
Take the copied layer and go to Filter>Blur>Gaussian Blur. Set it on 2px for the amount. Do this to all copied layers.

Step 5
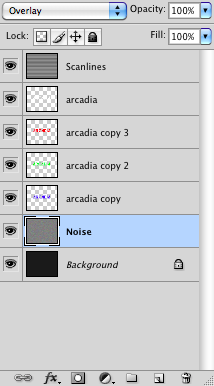
Take the TV-Scanlines and set it on top. Set the Blend Mode to "Overlay" and the Opacity to 15%.
Now create a new layer and go to Edit>Fill. Take 50% Grey.
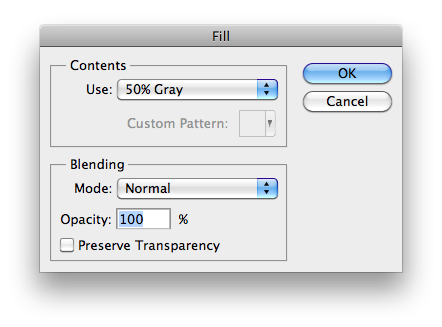
Then go to Filter>Noise>Add Noise. Take an amount of 16%, Gaussian and uncheck "Monochromatic".
Set the layer just over the Background.
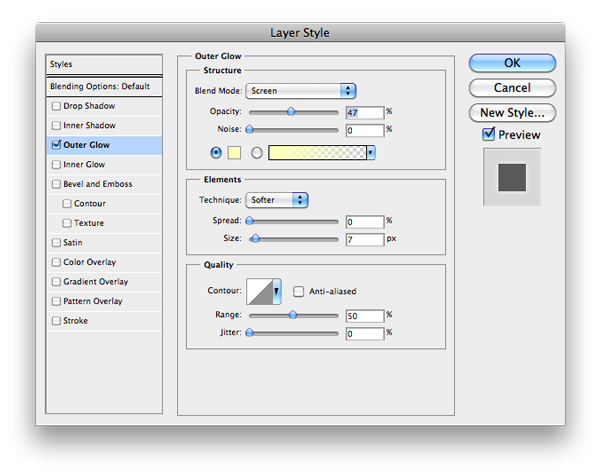
Step 6
Write "START" on it and apply the "Outer Glow" Effect on this layer
Step 7
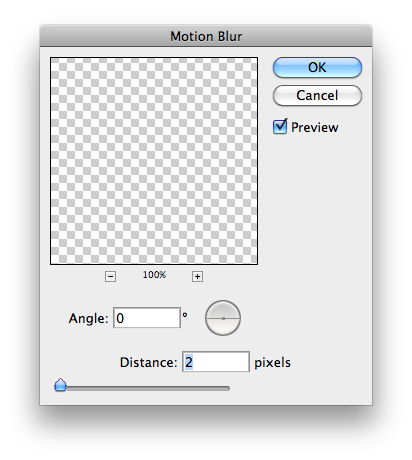
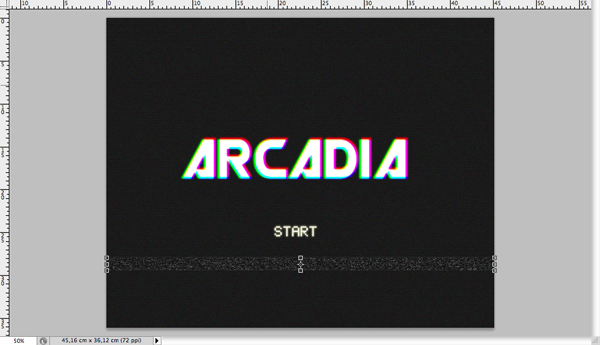
Now lets do this Error-Scan lines. Create a new layer and select a little Stripe with the Marquee-Tool (M). Go to Edit>Fill with 50% Grey. Then go to Filter>Noise>Add noise 20% but _Monochromatic_.
Press Ok then go to Filter>Blur>Motion Blur and set this on 2px. After that, set the Blend Mode of this layer to "Hard Light". Now Copy this layer and resize it a bit smaller. Do this a few times until you have enough error lines.
Step 8
Now comes the tricky part. First of all take all the "Arcadia"-layers and Press Command (MAC)/ Control (PC) M to Merge the layers together. Then take the Marquee-Tool (M) and select about the half of the Arcadia-Text.
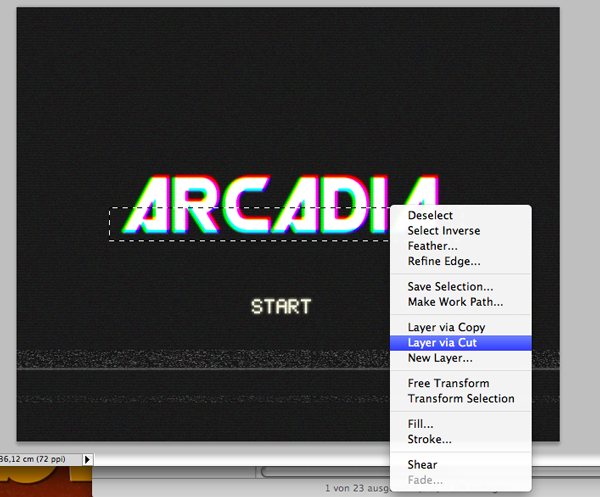
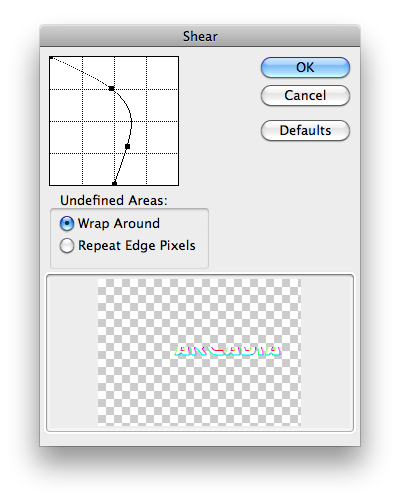
Then press right-mouse and "New layer via Cut". Now you should have two Arcadia-layer. One for the Top and the other for the bottom of the Text. Select the bottom one and go to Filter>Distort>Shear and take the following Options. Maybe you have to tweak a little bit until you have the right bend.
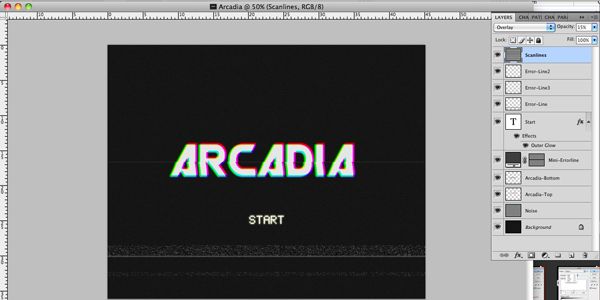
Step 9
Take the Line-Tool and draw a horizontal 1px line in grey and set it on Blend Mode "Lighten". Set the two Arcadia-layers to 89% Opacity and you're finished.
 Sample.zip
'Freebies - resources > Design-Tutorial' 카테고리의 다른 글
| Simple Underwater Scene in Photoshop : 포토샵 듀토리얼 (0) | 2010.06.19 |
|---|---|
| 포토샵 브러쉬 듀토리얼 (0) | 2010.06.13 |
| Various elements - tutorial : 포토샵 튜토리얼 (0) | 2010.06.09 |
| [펌]! Create a Dark and Surreal Poster Using Your Own Portrait : 포토샵 강좌, 듀토리얼 (0) | 2010.04.06 |
| Navigation Part 1 : Illust Tutorial 일러스트 강좌 (0) | 2010.04.02 |
댓글